Test Setup
T-Test
Equipment:
4 cones, stopwatch, flat surface (min. 10m)
Agility test measuring change of direction, lateral movement, and body control.
The T-Test evaluates agility, specifically the ability to accelerate, decelerate, and change direction while maintaining control.
Setup:
- Place 4 cones in a T-shape:
- Cone A (start)
- Cone B: 10 meters straight ahead from A
- Cone C: 5 meters left from B
- Cone D: 5 meters right from B
Execution:
- Start at cone A
- Sprint forward to cone B and touch it with your hand
- Shuffle left to cone C and touch it
- Shuffle right to cone D and touch it
- Shuffle back to cone B and touch it
- Backpedal to cone A (finish)
Rules:
- Face forward during all lateral movements
- Do NOT cross feet during shuffle
- Touch each cone with your hand
- Maintain low center of gravity during direction changes
- Do NOT turn and run during lateral phases
- Time stops when you reach cone A
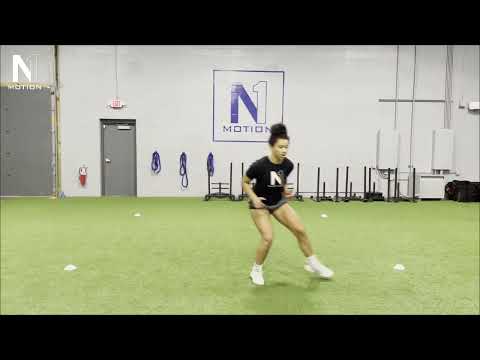
Hexagon Test
Equipment:
tape or chalk, stopwatch, flat non-slip surface
Measures coordination, foot speed, and reactive agility through repeated jumps.
The Hexagon Test evaluates foot speed, coordination, and the ability to quickly change direction while maintaining rhythm and control.
Setup:
- Draw a hexagon on the ground using tape or chalk
- Each side should be approximately 60 cm
- Stand in the center of the hexagon with feet together
- Number the sides mentally (1 to 6) to keep direction consistent
Execution:
- Start in the center with feet together
- Jump forward over one side and immediately back to center
- Continue jumping over each side in a clockwise direction
- Complete the full hexagon sequence (6 sides)
- Repeat for a total of 3 full revolutions (18 jumps out and back)
- Maintain a steady rhythm throughout the test
Rules:
- Keep feet together during all jumps
- Do NOT step or separate feet
- Always return to the center before the next jump
- Do NOT skip sides or change direction
- Maintain balance and control (no falling)
- Time stops after completing all repetitions

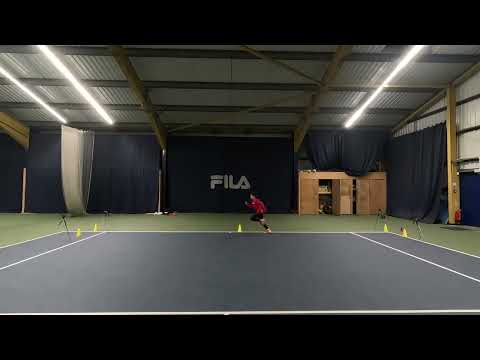
Sprint 5m
Equipment:
2 cones, stopwatch, flat surface (min. 10m)
Measures acceleration and explosive start over a short distance.
The 5m sprint test evaluates explosive acceleration and first-step quickness, which are critical in sports like tennis.
Setup:
- Place two cones 5 meters apart
- Cone A = start line
- Cone B = finish line
- Measure distance precisely (5 meters)
- Athlete starts behind the start line
Execution:
- Start from a stationary standing position
- Front foot just behind the start line
- On signal, sprint максимально быстро вперёд
- Run straight through the finish line without slowing down
Rules:
- No rolling or moving start (must be static)
- Do NOT anticipate the start signal
- Sprint through the line (no deceleration before finish)
- Time stops when torso crosses the finish line
- Perform 2–3 attempts and keep the best time

Sprint 10m
Equipment:
2 cones, stopwatch, flat surface (min. 15m)
Measures acceleration and speed development over 10 meters.
The 10m sprint test evaluates acceleration ability and how quickly an athlete builds speed after the initial start phase.
Setup:
- Place two cones 10 meters apart
- Cone A = start line
- Cone B = finish line
- Measure distance precisely (10 meters)
- Athlete starts behind the start line
Execution:
- Start from a stationary standing position
- Front foot just behind the start line
- On signal, sprint forward as fast as possible
- Accelerate progressively and run through the finish line
Rules:
- No rolling or moving start (must be static)
- Do NOT anticipate the start signal
- Maintain forward sprint mechanics (no lateral deviation)
- Sprint through the line (no slowing down before finish)
- Time stops when torso crosses the finish line
- Perform 2–3 attempts and record the best time
Plank Hold
Equipment:
exercise mat, flat surface
Measures core stability and muscular endurance.
The plank test evaluates core stability and endurance, focusing on the ability to maintain proper body alignment under fatigue.
Setup:
- Place forearms on the ground, elbows directly under shoulders
- Feet hip-width apart
- Body in a straight line from head to heels
- Engage core and glutes before starting
Execution:
- Lift body off the ground and hold the plank position
- Keep body aligned (no sagging or raising hips)
- Breathe normally throughout the test
- Hold the position as long as possible
Rules:
- Body must remain in a straight line at all times
- No lifting hips too high or dropping them low
- Elbows must stay under shoulders
- No resting or shifting position to recover
- Test ends when proper form is lost
- Time is recorded in seconds

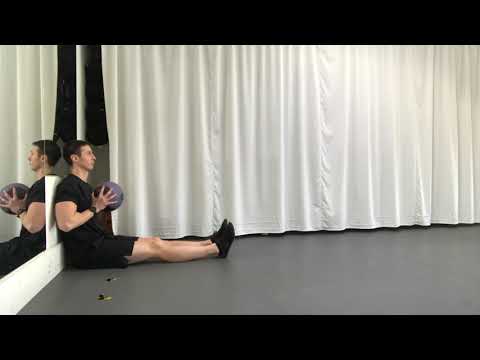
Medicine Ball Throw
Equipment:
medicine ball (2–4 kg), measuring tape, flat surface
Measures upper body explosive power (chest throw).
This test evaluates upper body explosive power using a seated chest pass, minimizing lower body contribution.
Setup:
- Sit on the ground with legs fully extended
- Back straight against a wall (or fixed support)
- Hold the medicine ball at chest level
- Ensure no space between back and wall
Execution:
- Push the ball forward explosively from the chest
- Use both hands simultaneously (chest pass)
- Throw as far as possible in a straight line
- Measure distance from wall to first contact point of the ball
Rules:
- Back must remain in contact with the wall at all times
- No trunk rotation or forward lean before release
- Do NOT use legs or generate momentum from lower body
- Ball must be thrown from chest (not overhead)
- Perform 2–3 attempts and record the best distance
Vertical Jump
Equipment:
wall, chalk or measuring device, flat surface
Measures lower body explosive power (vertical jump height).
The vertical jump test evaluates lower body explosive power by measuring the difference between standing reach and jump height.
Setup:
- Stand next to a wall with one arm extended upward
- Mark the highest point you can reach while standing (standing reach)
- Apply chalk to fingers or use a measuring device
- Feet flat on the ground, body fully extended
Execution:
- Start from a standing position
- Perform a quick downward movement (countermovement)
- Jump vertically as high as possible
- Touch the wall at the highest point of the jump
- Measure the difference between standing reach and jump mark
Rules:
- Jump must be vertical (no step or run-up)
- Both feet start flat on the ground
- Use consistent technique across attempts
- Do NOT take a step before jumping
- Perform 2–3 attempts and record the best result
- Result is measured in centimeters (jump height difference)

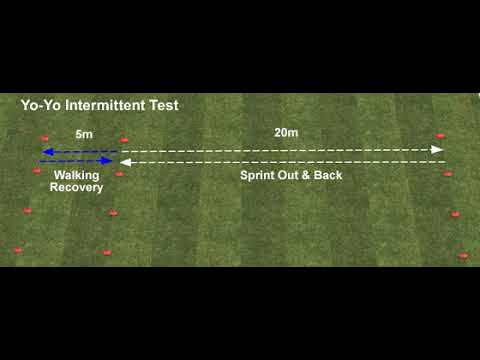
Yo-Yo Test (Level 1)
Equipment:
cones, audio track (Yo-Yo IR1), flat running surface (20m)
Measures aerobic endurance with repeated shuttle runs and short recovery periods.
The Yo-Yo Intermittent Recovery Test Level 1 evaluates an athlete’s ability to repeatedly perform high-intensity runs with brief recovery periods.
Setup:
- Place two cones 20 meters apart (running zone)
- Mark a recovery zone 5 meters behind the start line
- Use an official Yo-Yo IR1 audio track
- Athlete starts at the starting line
Execution:
- Run from start line to the 20m line and back, following audio beeps
- Each shuttle must be completed before the next beep
- After each shuttle, walk/jog to the 5m recovery zone and return
- Continue as speed progressively increases
- Maintain pace with the audio signals throughout the test
Rules:
- Must reach the line before the beep (timing is critical)
- Test ends after 2 consecutive missed beeps
- No early starts before the beep
- Follow the exact running distance (20m out and back)
- Recovery period must be respected (active recovery only)
- Final result = last successfully completed level or total distance
Beep Test (20m Shuttle Run)
Equipment:
cones, audio track (Beep Test), flat running surface (20m)
Measures aerobic endurance through continuous shuttle runs with increasing speed.
The Beep Test evaluates aerobic capacity (VO2max) by requiring continuous shuttle runs at increasing speeds dictated by audio signals.
Setup:
- Place two cones 20 meters apart
- Use an official Beep Test audio track
- Athlete starts at one of the lines
Execution:
- Run back and forth between the two lines (20m)
- Each shuttle must be completed before the next beep
- Speed progressively increases at each level
- Continue running without stopping as long as possible
- Maintain pace with the audio signals
Rules:
- Must reach the line before the beep
- Test ends after 2 consecutive missed beeps
- No early starts before the beep
- Must touch or cross the line with foot
- No rest allowed (continuous running)
- Final result = last completed level or total shuttles
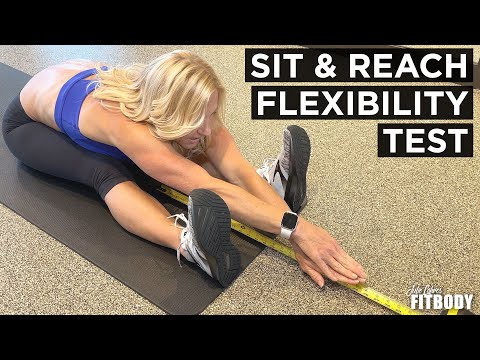
Sit and Reach
Equipment:
sit and reach box or ruler, flat surface
Measures flexibility of hamstrings and lower back.
The Sit and Reach test evaluates flexibility of the hamstrings and lower back, which is important for movement efficiency and injury prevention.
Setup:
- Sit on the floor with legs fully extended
- Feet flat against the box or ruler
- Knees must remain straight (no bending)
- Hands placed one on top of the other
Execution:
- Slowly reach forward along the measuring scale
- Keep legs straight and feet flat
- Extend as far as possible without bouncing
- Hold the final position for at least 1–2 seconds
- Measure the furthest point reached by fingertips
Rules:
- No bending of the knees
- No bouncing or jerking movement
- Movement must be slow and controlled
- Both hands move together evenly
- Perform 2–3 attempts and record the best result
- Result is measured in centimeters
BMI (Body Mass Index)
Equipment:
scale, stadiometer, flat surface
Estimates body composition based on height and weight.
BMI (Body Mass Index) is a general indicator used to classify body weight relative to height. It does not directly measure body fat but provides a useful screening tool.
Setup:
- Measure body weight in kilograms (kg)
- Measure height in meters (m)
- Ensure measurements are accurate (no shoes, upright posture)
Execution:
- Calculate BMI using the formula:
- BMI = weight (kg) / height² (m²)
- Example: 70 kg / (1.75 × 1.75) = 22.9
Rules:
- Use accurate and recent measurements
- Height must be measured without shoes
- Weight should be measured under consistent conditions
- BMI is an estimation, not a direct body fat measurement

Body Fat %
Equipment:
caliper or smart scale, flat surface
Estimates body fat percentage and body composition.
Body fat percentage estimates the proportion of fat mass in the body. It provides more insight than BMI but depends heavily on the measurement method.
Setup:
- Choose a measurement method: skinfold caliper or smart scale
- Ensure consistent conditions (same time of day, hydration level)
- Follow device-specific instructions carefully
Execution:
- Measure body fat using your chosen method
- For calipers: take measurements at standard body sites
- For smart scale: stand barefoot on the device
- Record the percentage displayed or calculated
Rules:
- Use the same method for all measurements (consistency is key)
- Avoid measuring after intense exercise or meals
- Hydration level can affect results (especially smart scales)
- Take 2–3 measurements and average if possible
- Result is expressed as percentage (%)

Summary & Interpretation
Overview of all test results and key areas to focus on.
Overview:
This assessment provides a complete profile of physical performance, combining speed, agility, coordination, strength, power, endurance, mobility, and body composition.
How to read:
- Each test reflects a specific physical quality
- The final score is a combination of all results
- Do not focus only on the total score — individual components are more important
- Look for strengths and weaknesses across different categories
Categories:
- Speed (5m, 10m): ability to accelerate and react quickly
- Agility (T-Test): ability to change direction efficiently
- Coordination (Hexagon): footwork and movement control
- Strength (Plank): core stability and endurance
- Power (Vertical Jump, Medicine Ball): explosive force production
- Endurance (Yo-Yo / Beep Test): ability to sustain repeated effort
- Mobility (Sit & Reach): flexibility and movement range
- Body Composition (BMI, Body Fat %): physical profile and health indicators
Interpretation:
- Balanced profile = consistent results across all categories
- Imbalance = one or more weak areas limiting performance
- High speed but low endurance → difficulty sustaining intensity
- Good endurance but low power → lack of explosiveness
- Strong but low mobility → increased injury risk
- Good coordination but low strength → limited stability and control
Focus:
- Identify your weakest category — this is your priority
- Maintain your strengths while improving weak areas
- Avoid focusing only on what you are already good at
- Progress should be measured over time, not in a single test
Recommendation:
- Repeat the test every 6–8 weeks to track progress
- Train specifically based on your weakest qualities
- Combine physical training with sport-specific practice
- Use results as guidance, not as absolute judgment